The Rose Garden

Eastern Agricultural Complex recipes, amatuer utopian fiction, who knows what else

Trying Out the FAKE_POD_NANO

Why?

So, I've been trying to effectively de-centralize my music listening for years and years now. That includes Funkwhale, but there's been a lot of reliability issues there while the software matures. It works great when it's not down though. (Thanks @gravitas@pl.ugh.im so much for hosting my tunes all this time!) What has worked much more reliably has been... the good old mp3 player. Or DAP (digital music player), as they call it these days. Makes sense, all I put on there are .flacs files afterall.

Many years ago, I bought a used Shanling Q1 off eBay, and put Rockbox on it. It sounded great and had plenty of battery life, and my modest collection doesn't come close to pushing the storage limits on SD cards these days. It saw me through a lot of bad times and good, but one day it finally broke... I failed to repair it, as did several friends and a professional. Shanling did send us some free replacement parts, but honestly shame on them for making such an unrepairable product and not supporting it longer.

Looking for a suitable replacement was a challenge. Most of the proprietary options that have been Rockboxed are either getting pretty old and rare these days, or else are brand new and cost a fortune. OR, are brand new but don't have a decent dedicated DAC inside? Really?? Innioasis does say they might rectify that in the future though.

In the open source realm, there seem to be even fewer options. The Tangara woulda been absolutely perfect, but the CrowdSupply batch ran out and there's no way I'm competent enough at soldering to build one myself. (I still really want one though, @jacqueline@chaos.social and co, y'all rock!!!) That led me to what really seems to be the only other open source DAP out there... The FAKE_POD_NANO.

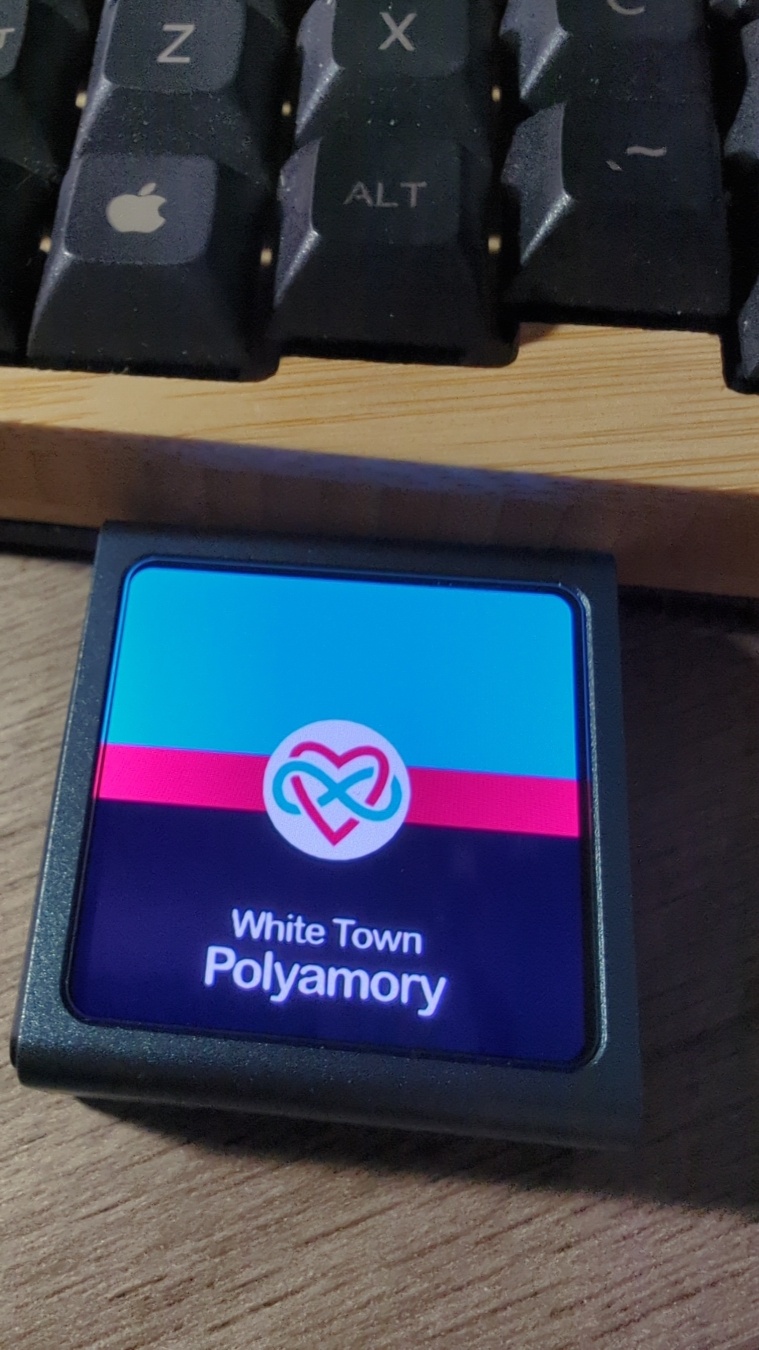
It's a Chinese project, and the more technical aspects of the documentation really do not auto-translate well at alllll, but a seller on Tindie had a really cool CNCed aluminum case version for sale. I went for it, and a month of shipping later, here we are!

The Hardware

A tiny, square, grey metal, mp3 player. It's more screen than anything else. Currently the screen displays the album cover for
The side of the player from before, showing it's two tiny metal buttons, SD card slot, USB charging port, and 3.5mm audio jack.
It's great. Case is really well made, nothing feels fragile or poorly aligned or anything. The AMOLED screen is super crisp, and the perfect size for album art. Looks easy enough to disassemble and repair too, but I'm not popping it open unless I have to. The SD card slot is such that the card itself will sit slightly inset into the case, once fully inserted. So, you'll need some kind of pokey to remove it. This makes sense but does worry me a bit, as my last player would occasionally get the card stuck on the inside edge of the case.

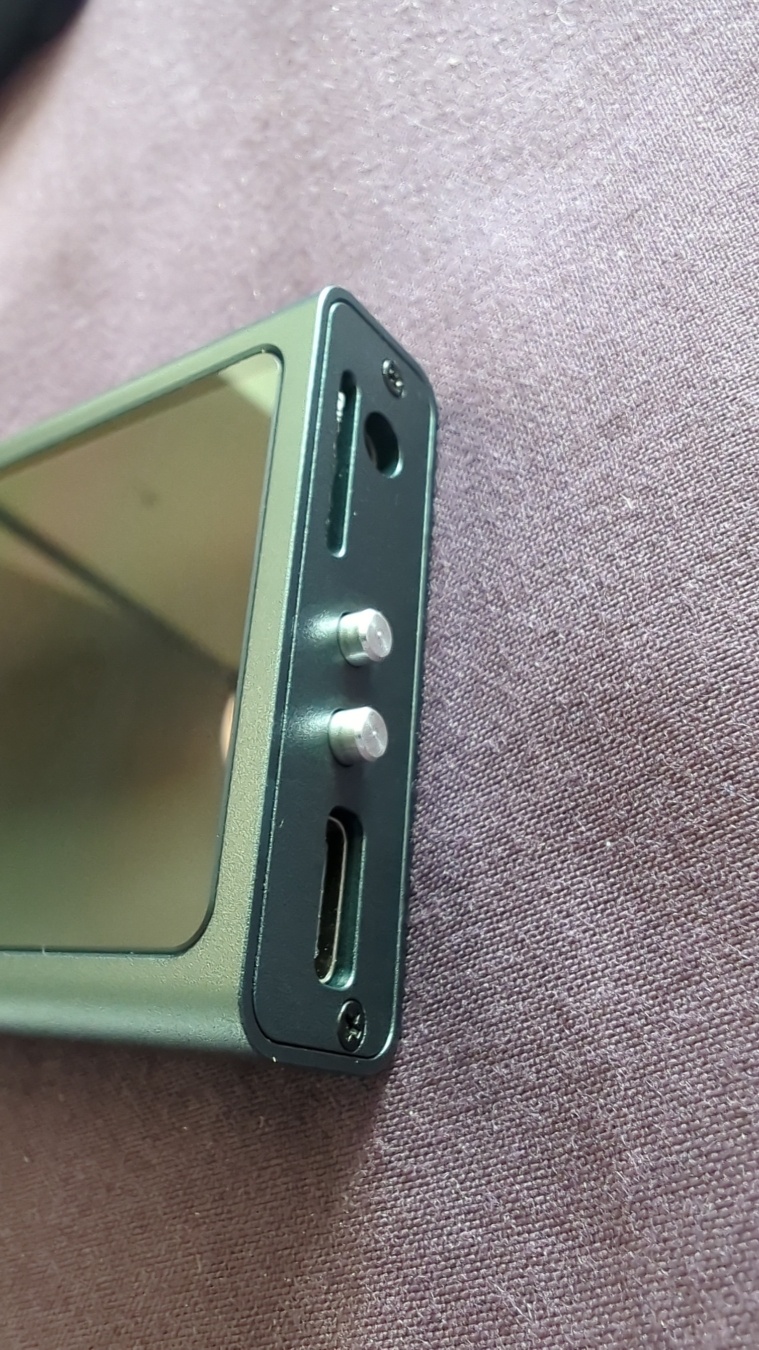
Also, completely randomly, this thing has a mic, gyroscope, and accelerometer in it! Why, I dunno. Maybe those come built-in on some component it uses, haven't looked that up. It doesn't use those features for much, but I'm sure it could if somebody wanted to mod it. Somebody told me the ESPv3 might be sluggish for a music player, but it super isn't. The thing responds plenty fast enough.

The battery life is modest but fair. More importantly for me, given what happened to my last player, the 603035 battery it uses seems easily replaceable. I'd estimate it gets around 8 hours or so of constant play time with the screen off.

Now, the sound quality... It's absolutely blowing my MIND!!! And that's in an old, cheap, well-used pair of Sennheiser Urbanites. Way better than my Q1 had everrrrrr been. This thing comes in two versions, and in my HiFi version that CS43131 DAC is reallllyyyy putting in the work!!

The Firmware

The same player from before, but now showing a list of letters alphabetically on the screen.
The same player again, but showing a list of songs.
A screen on the same player showing an About page with various info about the device.
For the most part it works fine. I mean, the menus are navigable and everything more-or-less does what it's supposed to do. I can actually use it, and have been, regularly.

However... Here's where things get dicey.

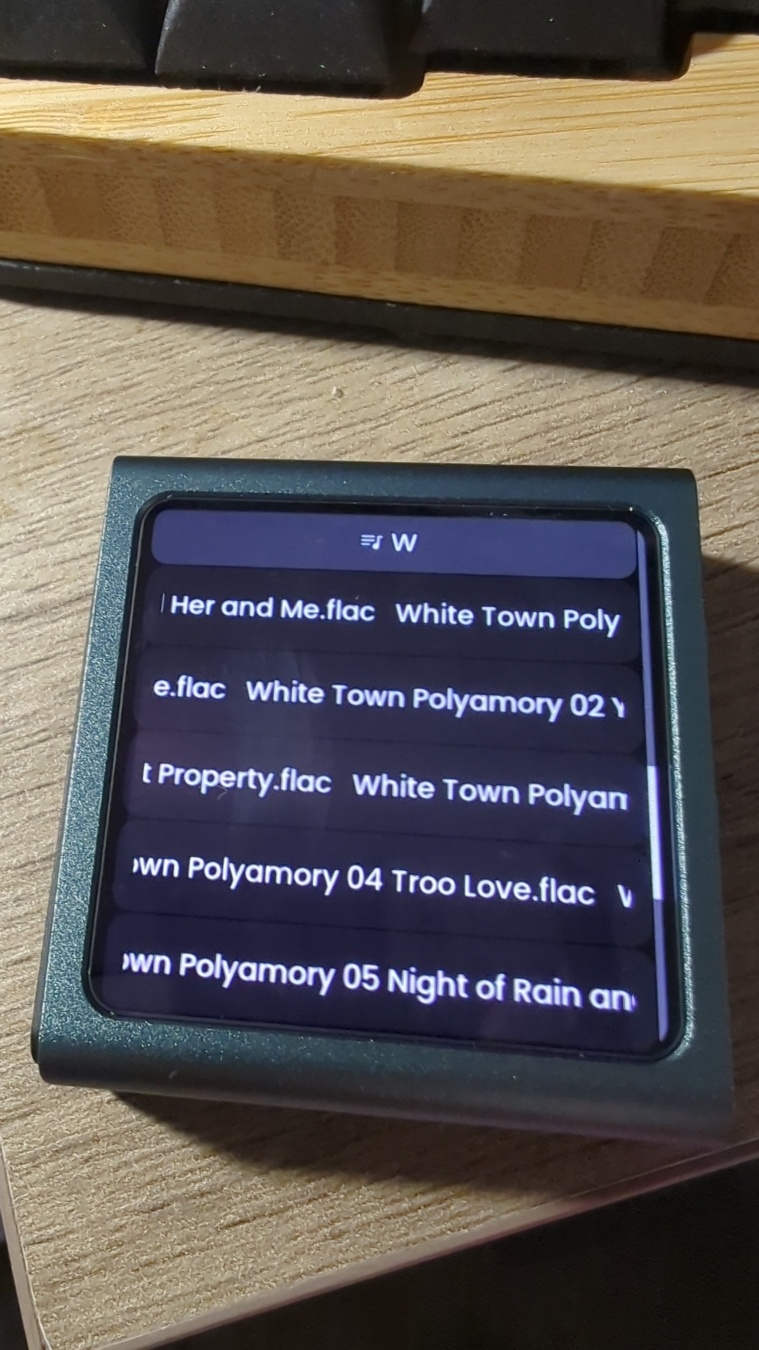
With a song paused, the browse menu closes WAY too fast. My file names are (too) long, and it takes them a sec to scroll across the tiny screen, so sometimes the browse menu times out before I can read the song titles I'm looking at. Gods forbid you be indecisive about what you wanna hear next!

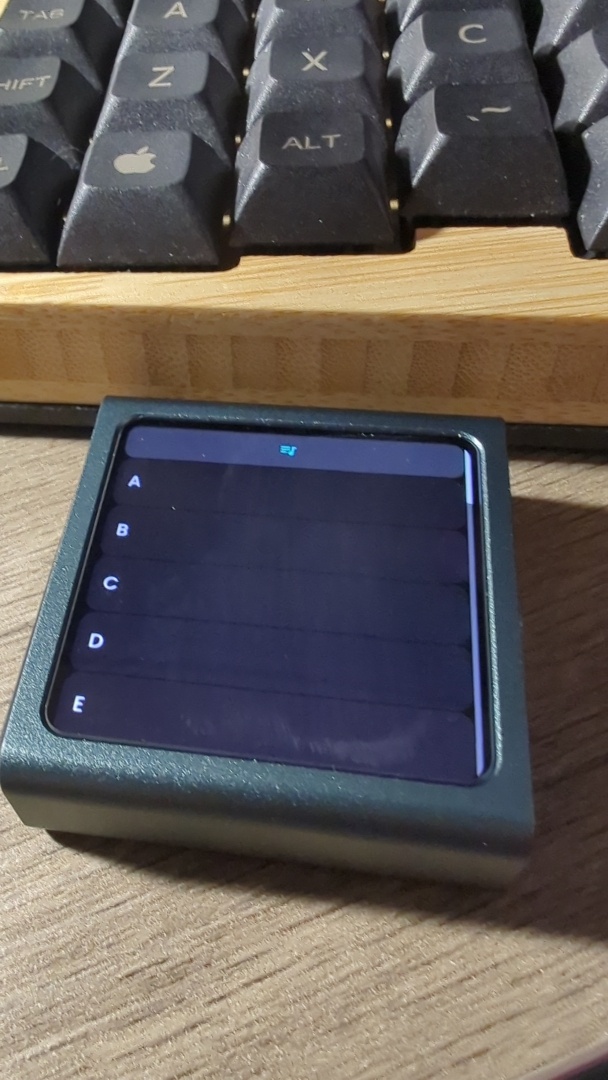
Next, if I'm understanding correctly, You can only have up to 255 folders, each with no more than 255 tracks inside. On top of that, it can only read one subfolder deep. So if you have your music organized “Artist folder > Album folders > Tracks”, that's not gonna work. It can't see them. Obviously these two things combined present a problem if you have a lot of music, compromises have to be made somewhere. I opted to make 27 folders, “A” through “Z” plus “Other”. Then I made sure my tracks were all named in the format [Artist] [Album] [Track no.] [Track title], and collapsed them into the appropriate lettered folder by name. If I ever surpass 255 in any particular letter, I'll just have to split it into something like “A1” and “A2”.

About playlists, that's what it seems to interpret each of these folders as. Not sure if there's a way to do more complicated things with playlists, like .m3u or .xspf files. It also generates one big so-called “playlist” file upon first scanning your SD, and that file can be updated with new additions from the menu. However, you're better off deleting the “playlist” file and rescanning the SD, because otherwise it puts any new stuff at the bottom of the list, instead of alphabetical... Plus rescanning is like LIGHTING fast anyway.

It can see and properly display metadata, but doesn't use it for literally anything else... So if you were thinking you'd just use a script to copy all your tracks into the root directory, good luck ever finding the one you're looking for afterwards. You can't sort by artist. You can't even play an album in order, unless the file names start “01, 02...” and are in the same folder.

And finally, certain songs fail to play. Sometimes re-transferring it over works, so I thought at first maybe it was just write errors to the SD card. But some don't. On the songs that don't, they generally play fine on my Linux desktop. If I force re-encode those files from .flac to flac, that seems to fix it. So, I'm guessing the files themselves must have some encoding issues that the desktop players are more tolerant of than the firmware on the device.

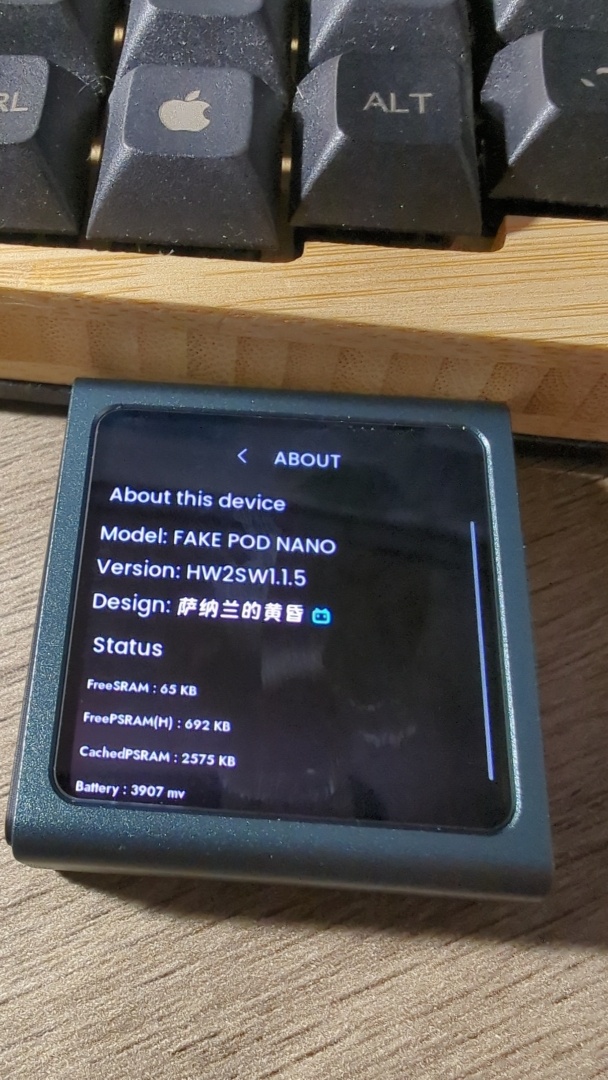
Finally, and most importantly... I can't (or else maybe don't know how to) update it! There's an OTA (over the air) update method using Bluetooth, but it doesn't seem to work for me. There's a firmware flasher with all the rest of the docs and files, on OSHWhub, but it's impossible to download anything from there without a Chinese phone number. This is all a shame because it does appear to be very actively developed. Maybe all my issues have been solved already and I just don't have access to the solutions? It does appear my current firmware version is close the very first one.

Phaseolus polystachios is a perennial bean vine, native to the so-called Eastern United States. It's in the same genus as most of the beans eaten here. Black beans, pinto beans, kidney beans, cannellini beans, navy beans, small red beans, great northern beans, and many others are all varieties of a single species, Phaseolus vulgaris, which isn't native or perennial here. Neither are Lima beans (Phaseolus lunatus), a species that thicket beans are much more closely related to. Or scarlet runner beans, Phaseolus coccineus, for that matter. If I'm reading this right, there are 9 phaseolus species actually native to the lower 48, and of those, only thicket beans can be found on the East coast. The rest, like delicious tepary beans, are all out west. There are also a few non-Phaseolus edible legumes native to this coast though, of varying tastyness and difficulty of preparation. For instance, Apios americana (potatoey tubers), various Strophostyles sp. (eat like a green bean), the peanut-like Amphicarpaea bracteata, the very dubiously edible Lupinus perennis, and perhaps best of all, Desmanthus illinoensis (like flax but must be cooked a little).

We know from archaeological sites that indigenous people ate thicket beans here long, long ago. There's even evidence they were in the process of being domesticated, until the already-very-domesticated vulgaris finally got traded this far north of it's origin and caught on instead. And, you can find countless sources online today proclaiming that it's edible, including the handful of nurseries selling the plant. What you can't find though, is a single freaking recipe! The closest I've gotten is this Permies thread saying it was too bitter and this youtube video saying it becomes delicious in only 10 minutes. Word is, there are folks out there trying to domesticate them again today, and even cross them with Limas.

You'll notice from pictures online that there seems to be 2 main versions of the bean, a jet black one and a brown mottled/speckled one. My hypothesis is that these versions cook up veryyyyy differently. Mine are the black kind, purchased from Prairie Moon back in 2020. I've been trying to figure out how to actually EAT them since 2021, completely unsuccessfully. Until now. Here's what I did.

A sufficient (but probably improvable) method to prepare thicket beans

  1. Collect the beans right before the pods explode. Preferably do so in a way that leaves the old pods on the vine, so our little friends have a nice place to build their overwinter nests. A hand holding a glass jar, in the background there's a tangle of vegetation. Some of the vegetation are bean pods on vines, growing all through everything else. The jar has some small, shiny black beans in it. Their sizes are quite variable.
  2. Soak the beans, for 24 hours, in water with salt and finely sifted wood ash. Baking soda would probably suffice. Change out the liquid every 8 hours. You'll notice that some of the beans begin to plump up and lighten in color. Their extremely tough seed coats have been penetrated. A metal pot containing a small amount of dark beans and a huge amount of water. A few of the beans are lighter in color and much more plump.
  3. Boil the beans in a fresh change of water (no ash this time, just salt) for 30 minutes. They're even more, and more of them, light and plump now. If you inadvisably taste them at this stage, they'll be bitter. This is an indicator of various toxins still present. A small plastic strainer containing smallish, darkish beans. Their colors and sizes are quite variable but they're all fairy plump and they're all some shade of dark red.
  4. Pressure cook the beans in another change of salty water for another half hour. At this stage they should all look pretty much alike, and very much like kidney beans. They should have skins with just a bit of bite, creamy interiors, and they should not be bitter at all! A small plastic strainer containing medium sized red beans. They're vaguely kidney shaped and colored, and mostly uniform. Some of the beans have burst slightly.
  5. Now just include them in your cooking however you would use canned beans. I made some faux “baked bean” sort of thing. A metal pot of what appears to be baked beans, with a spoon holding up a scoop of them. They're in a thin, dark, sweet looking gravy.

    Notes:

    Make sure you use a LOT of water each step! It takes a lot to leach all the bad stuff out. You'd think all this intense processing would reduce them to absolute mush, right? Luckily (or unluckily) the skins are easily tough enough to withstand all this pretty intact. Even if you release your pressure cooker's pressure really fast.

Some fairly normal, innocuous, even boring looking cookies sitting on a cooling rack

Ingredients:

  • 1 ⅓ cups × Spelt, flour, freshly milled
  • 1 cup × Butter, slightly melted
  • ¾ cups × Maple syrup
  • 2 ⅓ cup × Mesquite/Gleditsia sp., pulp, dried, powdered
  • 1 tsp × Baking soda
  • ½ tsp × Salt
    • Or, a suitably salty dried/powdered Atriplex species
  • 5 tsp Spice mix

Spice Mix:

(The ratio is what's important, but make enough to have 5 tsp for the cookies.)

  • 4 parts Spicebush/Lindera benzoin, berries, seed and flesh, dried, picked while red
  • 3 parts Anise Hyssop/Agastache foeniculum, leaves, dried
  • 3 parts Eastern White Pine/Pinus strobus, needles, dry roasted
  • 2 part Chiltepin/Capsicum annuum var. glabriusculum, fruit, dried
  • 2 part Sweetfern/Comptonia peregrina, catkins, dried
  • 1 part Bog Labrador Tea/Rhododendron groenlandicum, leaves, dried

Spice cookie/cake recipes generally call for “warming” spices, i.e. nutmeg, cinnamon, etc. The categorization of warming spices is a little fuzzy, not to mention Eastern Agricultural Complex ingredients have never been properly indexed in that way, unfortunately. Some I have tasted and am fairly confident would be considered “warming”, while for others I'm relying on descriptions. Either way, these are what I had on hand, and certainly not the optimal blend.

Steps:

  1. Using a molcajete or similar crushing/grinding mechanism, grind the whole spices until powdered.
    • Some spices have enough natural oil to become gummy rather than truly powder, or are too fibrous. Mortar & pestle style grinding can exacerbate this, so try other mechanisms either instead, or in conjunction with it. I used a mlcajete for everything and then forced it all through a tammy/sieve.
  2. Heat oven to 350 F.
  3. Whisk together the spelt, mesquite, spices, salt, and baking powder, set aside.
  4. In a separate bowl, whisk together the butter and maple syrup.
  5. Mix the wet and dry ingredients only as much as necessary for them to be consistent.
  6. Hand roll small balls of this dough, and space apart on a baking sheet.
  7. Bake until golden and crispy at edges.